After mixing and broadcasting gel bait for the control of little fire ants (LFA), the last thing you probably want to do is take extra time to clean your sprayer. We get it. However, if your sprayer is not properly cleaned, oily gel bait residue will grow mold and bacteria and leave a sticky film coating the inside of the tank, pump, hose, and nozzles. This buildup can lead to clogging, reduced spray performance, and a lot of unnecessary frustration. Properly cleaning your backpack sprayer after each use protects your investment and helps ensure it remains in reliable, stress-free working condition for years to come. Likewise, properly cleaning your Zep sprayer bottle can keep it functional for several months.
Before cleaning your sprayer, follow all safety precautions listed on the pesticide label (Tango™ or Advion® WDG). Wear appropriate personal protective equipment, including gloves, a long-sleeved shirt, long pants, closed-toed shoes, and socks while cleaning equipment.
Make sure to apply all of the gel bait during treatment. Only a very small amount of bait should remain, if any. Once you have finished treating your property, it is time for clean-up!
Note: These instructions are written for a backpack sprayer, but can be adapted to clean your Zep bottle as well.
FOLLOW THE STEPS BELOW TO CLEAN YOUR SPRAYER:
- RINSE THE TANK
Fill the tank one-third full with water and securely screw the lid back on. Shake the tank vigorously in all directions for approximately 5 seconds to loosen and remove gel bait residue from the tank bottom and walls. - FLUSH THE SYSTEM
Remove the nozzle cone and cap from the sprayer tip. Spray the water through the sprayer until residual gel bait is flushed from the pump system and only water exits the spray line. - REPEAT FOR A TRIPLE RINSE
Repeat Steps 1 and 2 two additional times to complete a triple rinse. - WASH WITH DISH SOAP
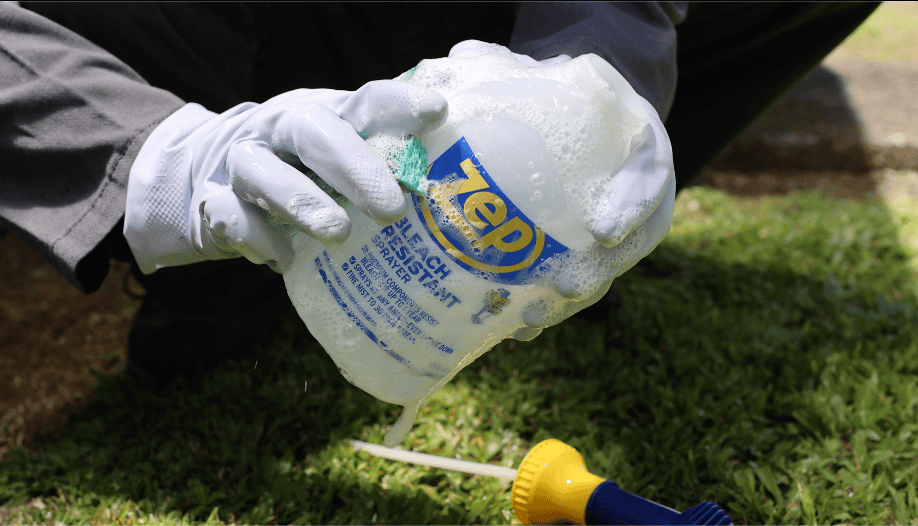
Fill the tank one-quarter full with fresh water and add 3-4 tablespoons of dish soap. Agitate the soapy mixture inside the tank, and use a sponge or scrubber to wash the inside of the tank. Spray at least half of the solution through the sprayer until only soapy water exits the system to flush the internal components. Empty the tank. - CLEAN THE EXTERIOR
Using soapy water and a sponge, scrub the exterior of the tank, hose, sprayer tip, and straps. - RINSE THOROUGHLY
Rinse the tank and exterior of the sprayer with fresh water until all soapy residue is removed. Be sure to flush the internal components with clean water. - DEGREASE THE SYSTEM
Fill the tank one-quarter full with fresh water and add ½ – 1 cup of a biodegradable degreaser (such as Simple Green). Shake the tank vigorously or use a sponge to scrub the inside and outside of the tank, then spray ⅓-½ of the solution through the sprayer until it moves through the pump system and exits the spray tip. Reattach the nozzle cone and cap. DO NOT EMPTY. - SOAK AND DRAIN
Allow the degreaser solution to sit in the tank and sprayer for 24 hours. After soaking, empty the tank and rinse with fresh water. Pump out any remaining solution from the sprayer line. Allow the sprayer to dry fully before replacing the cap to reduce mildew and bacterial growth. - CHECK FOR RESIDUE
Once the sprayer has dried, touch the inside and outside of the tank. If the surface still feels tacky from oily residue, repeat Step 4 using a stronger dish soap solution, followed by Step 7 with the degreaser.
Taking the time to properly clean your sprayer after each use will help prevent clogs, maintain spray performance, and extend the life of your equipment. Happy cleaning!